Sunday, July 3, 2011

Civic Front Lower Ball Joint Replacement

My car had been clunking over bumps. It had been wandering under braking and the handling wasn't what it should be. After a lot of lying on my back, prodding bits of car, I found that one of the front lower ball joints needed replacing. To complicate matters, one of the front track rod ends also needed replacing.

The track rod end is fairly easy to replace and is covered in detail throughout the internet so I shan't dwell on that. The ball joint replacement is more challenging so I shall focus on that.

Honda don't supply ball joints separately. They supply knuckle assemblies with the ball joint fitted. This is costly, and requires a hydraulic press to fit the wheel bearing and hub. Wheel bearings are also costly! Ball joints can be found, however, and fitted to your knuckle using a hydraulic press. Sounds like a perfect excuse for buying a bad-ass tool!

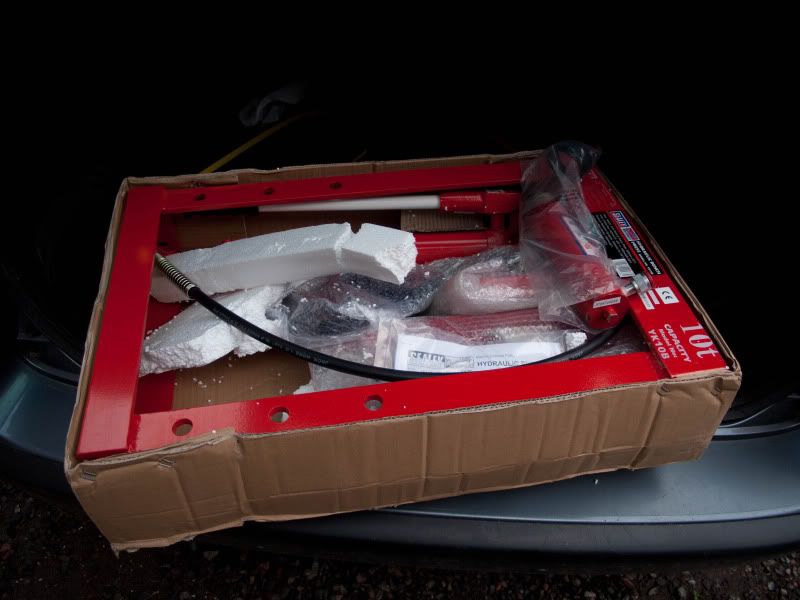
It's a heavy bugger, 50kg! Here's the package freshly collected from the courier depot.


It comes in kit form, yay!


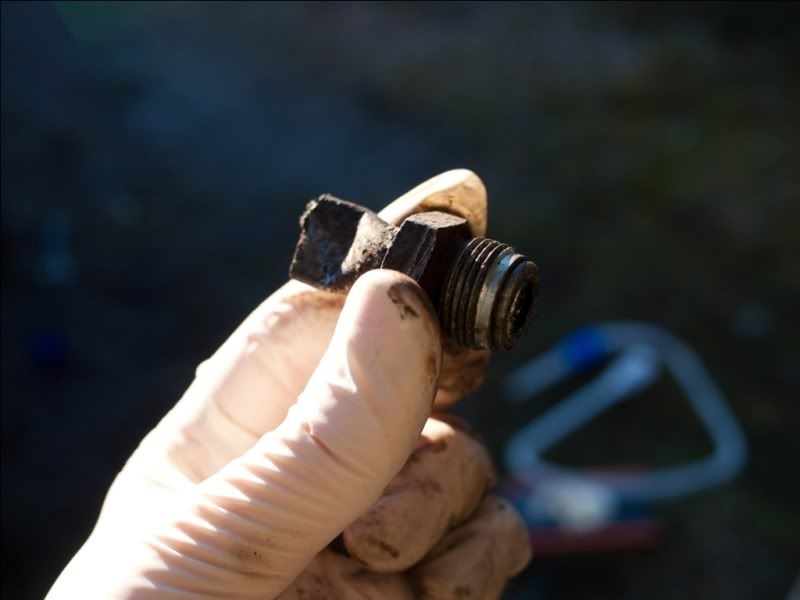
After assembly and commissioning of the press, I set about replacing the ball joints. This requires substantial disassembly of the front hub. The most important first step is loosening the hub nut. This nut is 'peened' to prevent it loosening, so it must first be 'un-peened' using a screwdriver, hammer or whatever you find works.

After this the nut can be loosened but beware, it is tight. I mean stupidly tight. I mean scottish-man's wallet tight. Seriously, I was using a 24" breaker bar and was a sweaty mess afterwards! The car must first be lifted and the front wheels removed. The plastic centre cap on the allots must be removed, the wheels refitted and the car lowered to the ground. Put the car in-gear and this should allow access to the hub nut and prevent the wheel from turning when you're wailing on it like a Ninja.

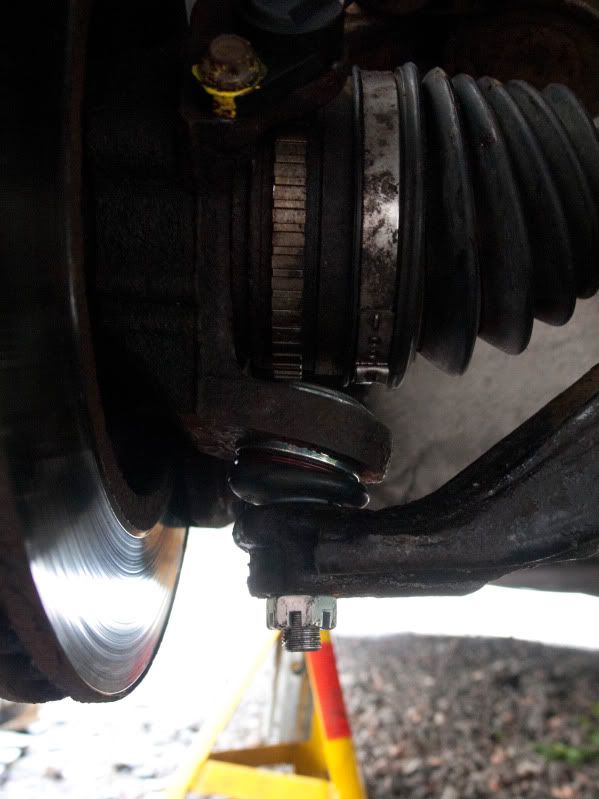
Once loose, the car can be put on axle stands and the hub assembly taken apart. Be careful not to pull on the drive shafts, they may need a tap to un-seat them from the hub. Remember to re-position the brake caliper which can be put on the ground without straining the hose. Also remove the abs sensor which can be quite stubborn.

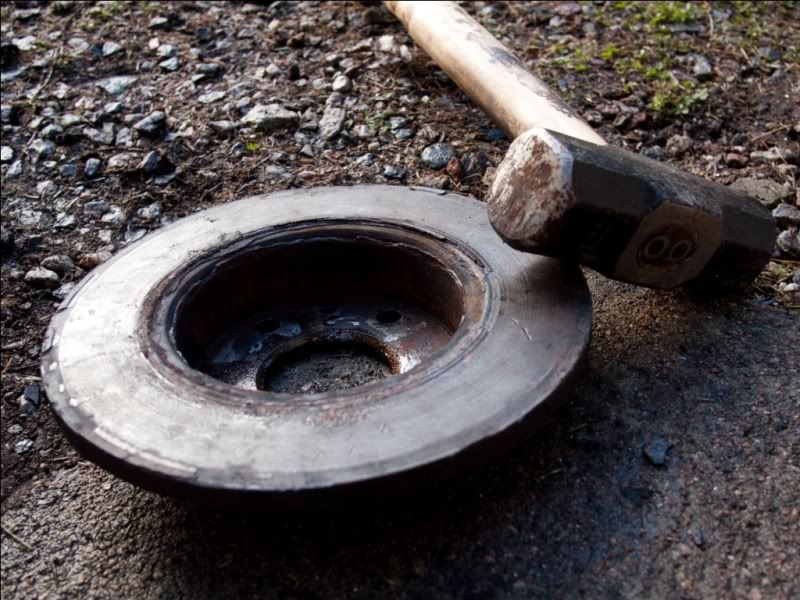
Once the knuckle is separated, it became clear that the disc guard had to be removed as it would just foul when using the hydraulic press. To remove it properly, the hub must be pressed out of the bearing but this was an unacceptable risk because removing or tampering with bearings often results in damage to the bearing. It was a tough call, but I decided to cut the dust guard off. There are also three screws which must be removed, but the hub gets in the way! I found vice-grips was the solution.

Then the fun began! The press was used to remove the ball joint. I won't even begin to describe how to do this because it's so dependent on what press you're using. Basically just use trial and error, cautiously, to find a method that works for you. It shouldn't take too much force to remove.

Once removed, clean up the knuckle as you don't want any dirt spoiling the fun when fitting the new one. I put the new ball joints in the freezer overnight. This makes the ball joint shrink slightly and easier to fit. Again, use trial and error CAUTIOUSLY! to fit the new ball joint. Also, make sure you have an appropriate size socket which means all the load is carried through the strong outer base of the ball joint rather than the vulnerable centre which could deform the ball joint casing. I found a 38mm impact socket from Halfrauds worked perfectly.

Once pressed into place, refit everything and revel in how much of a mechanical bad-ass you are!

Some pictures:

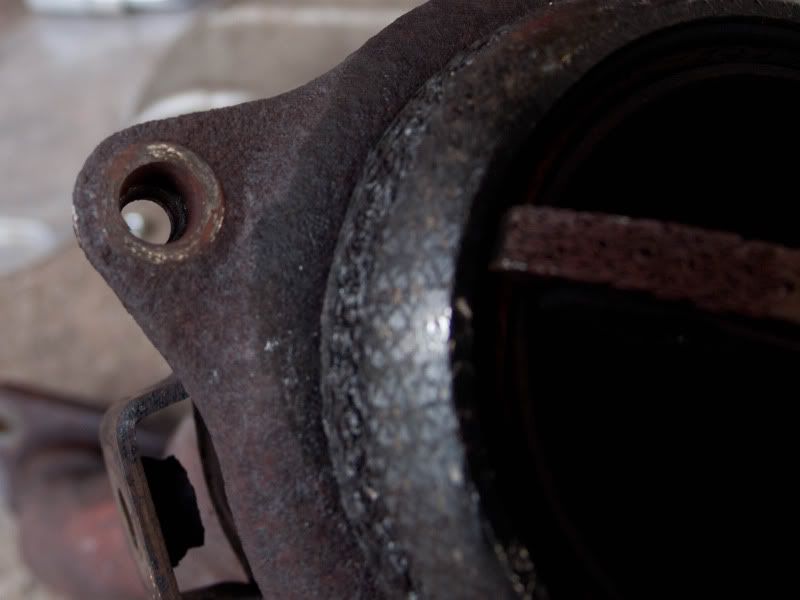
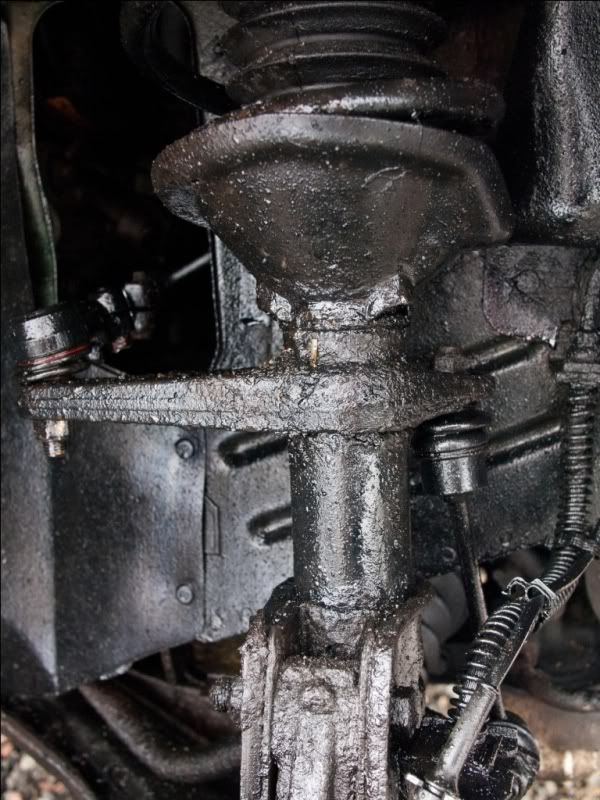
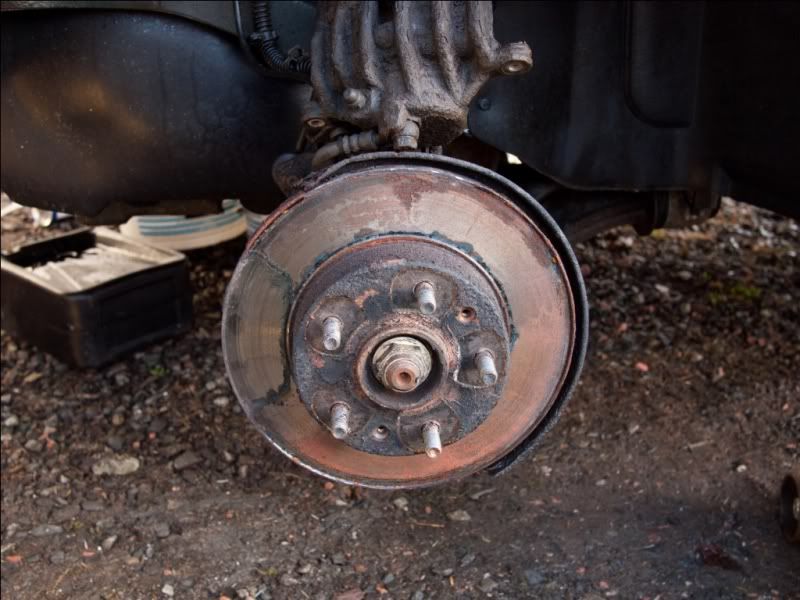
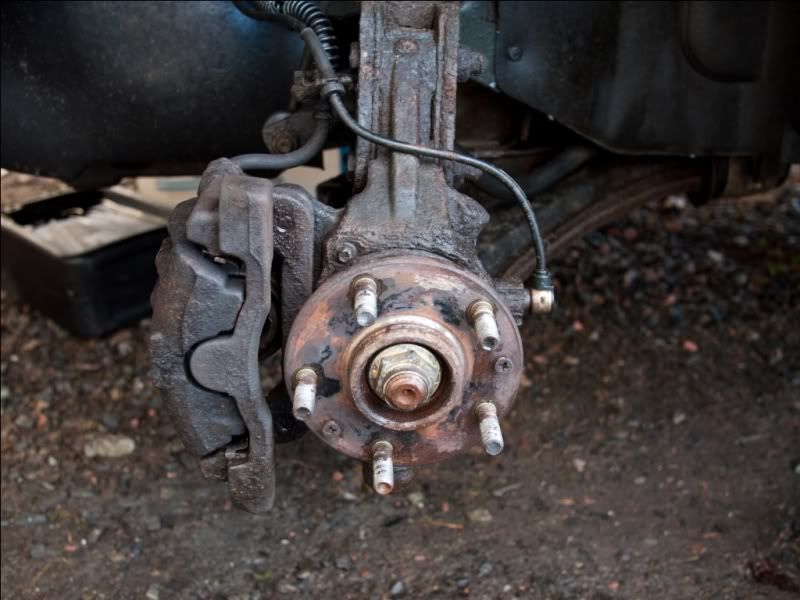
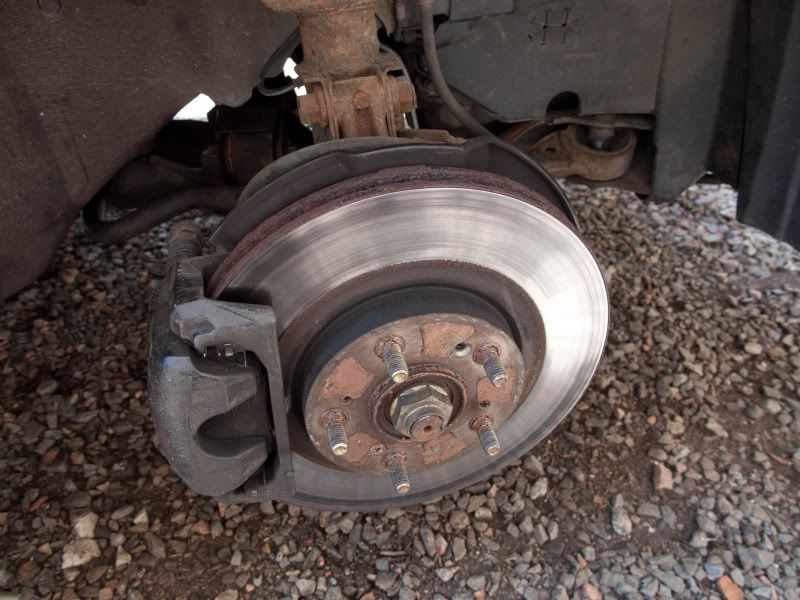
How it all looked to begin with.


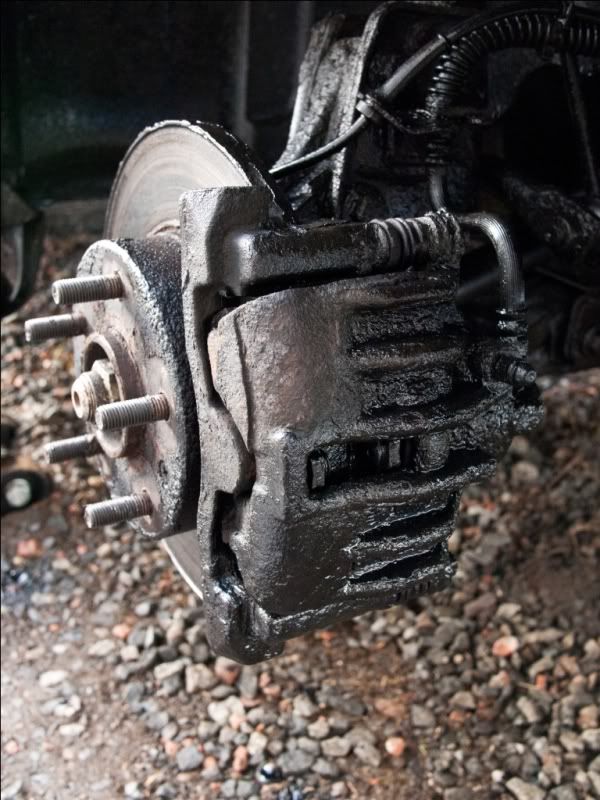
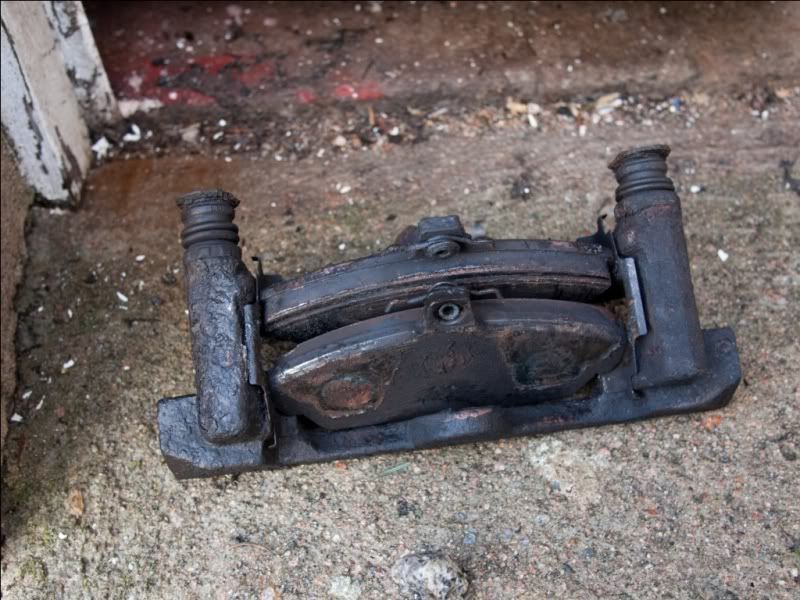
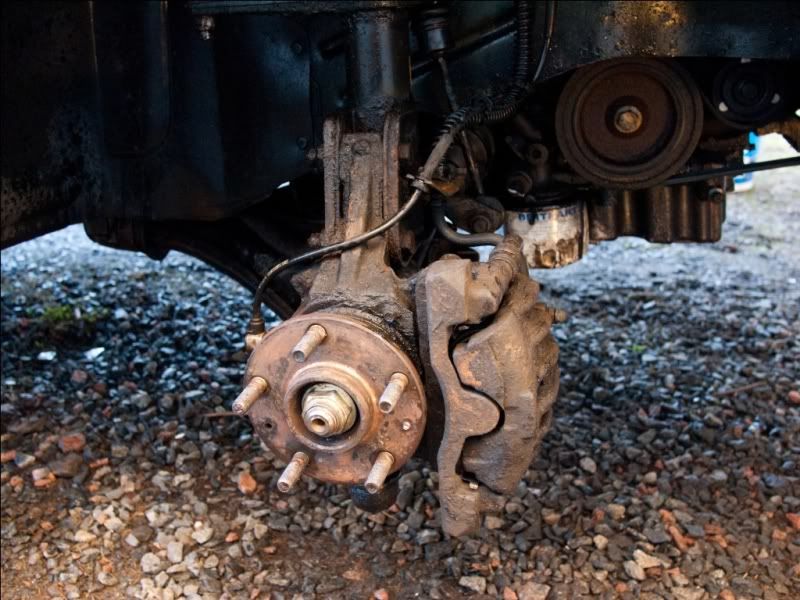
Removed the brake caliper and disc.


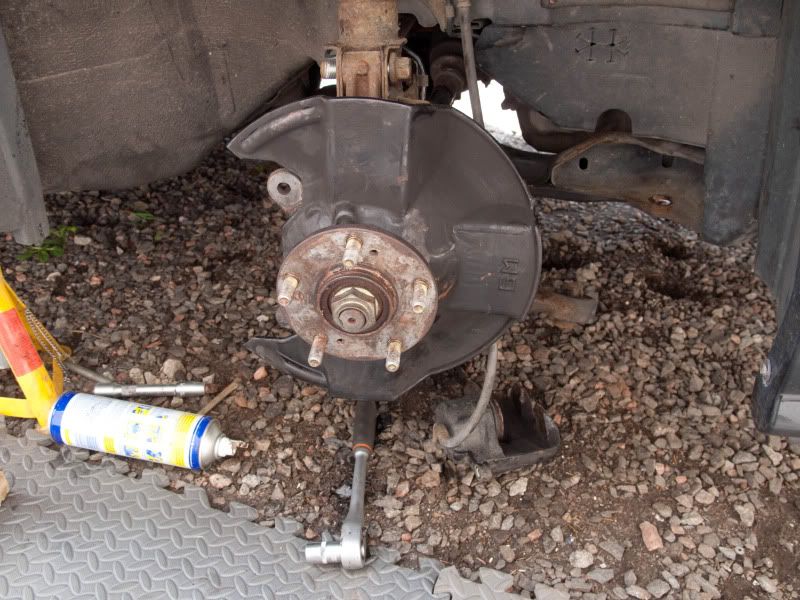
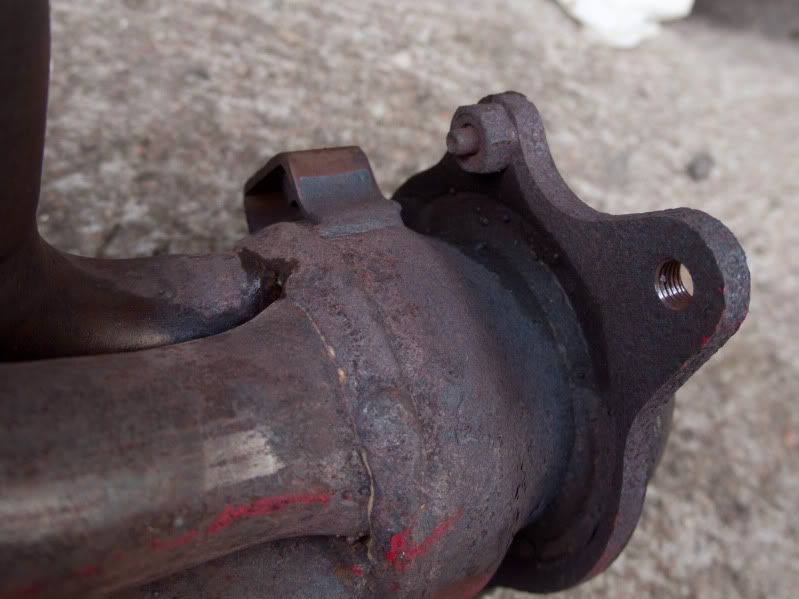
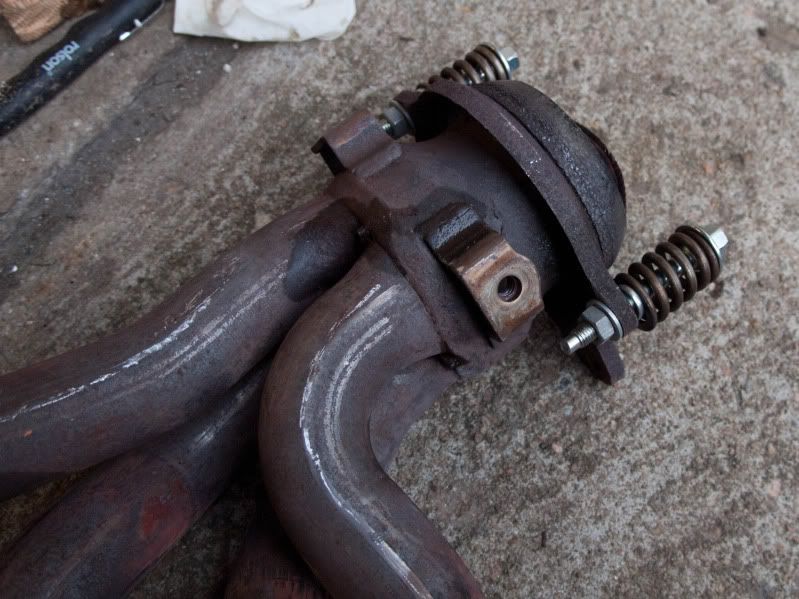
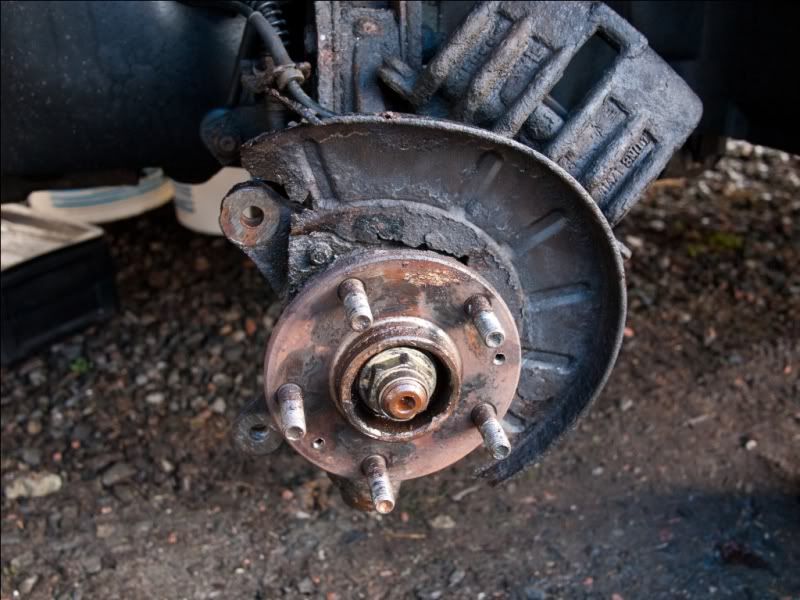
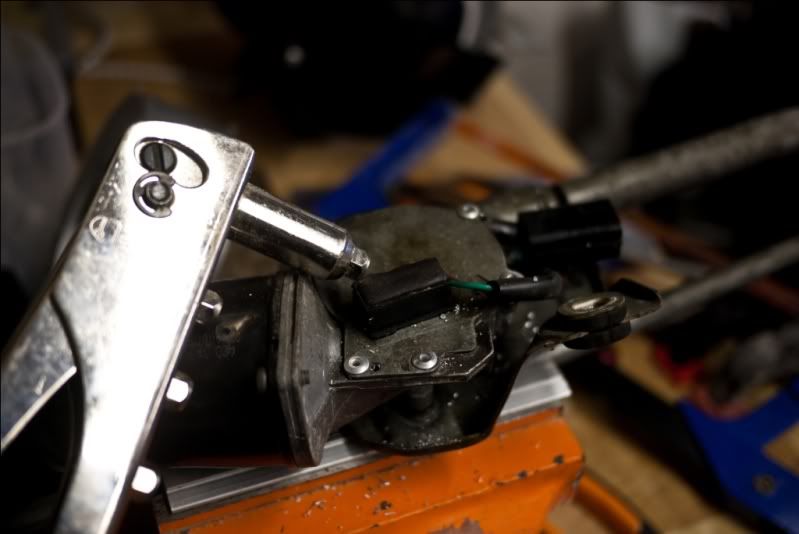
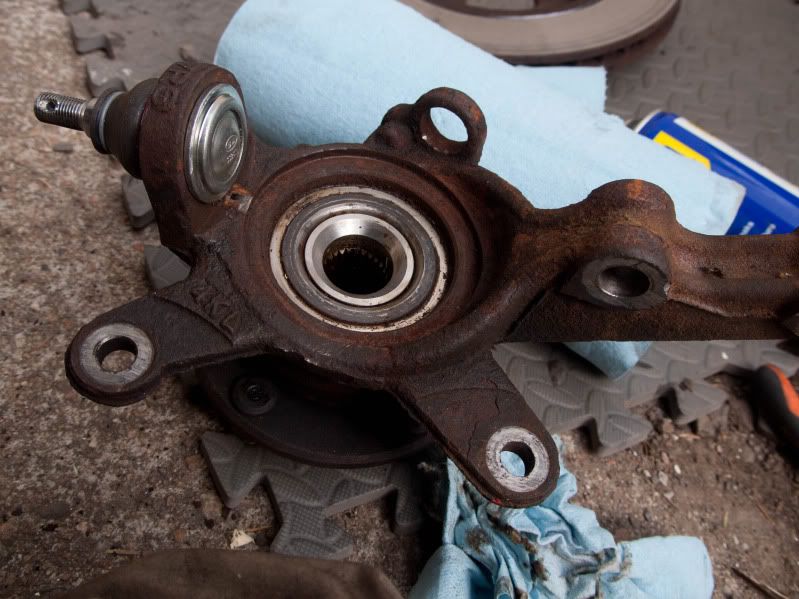
Knuckle removed from the car. Unfortunately the lower ball joint just would not split so I had to remove the lower control arm / wishbone too and separate it off the car.


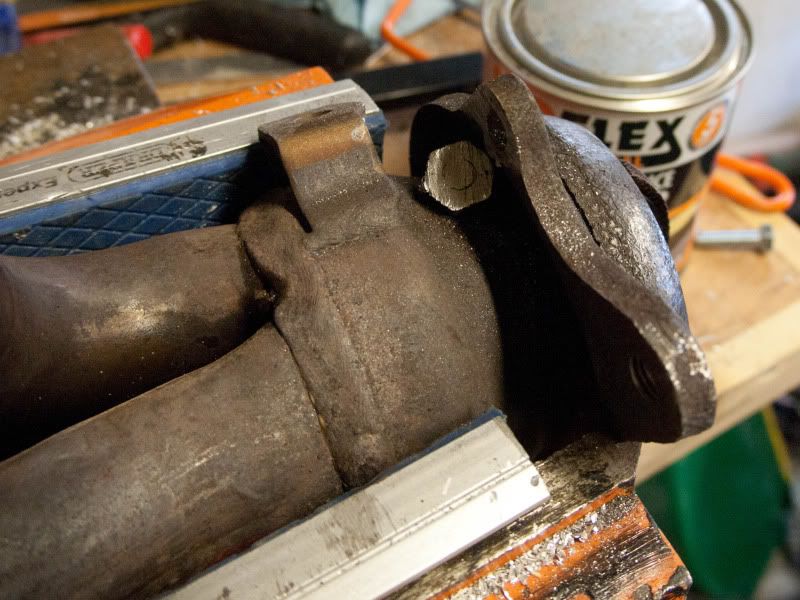
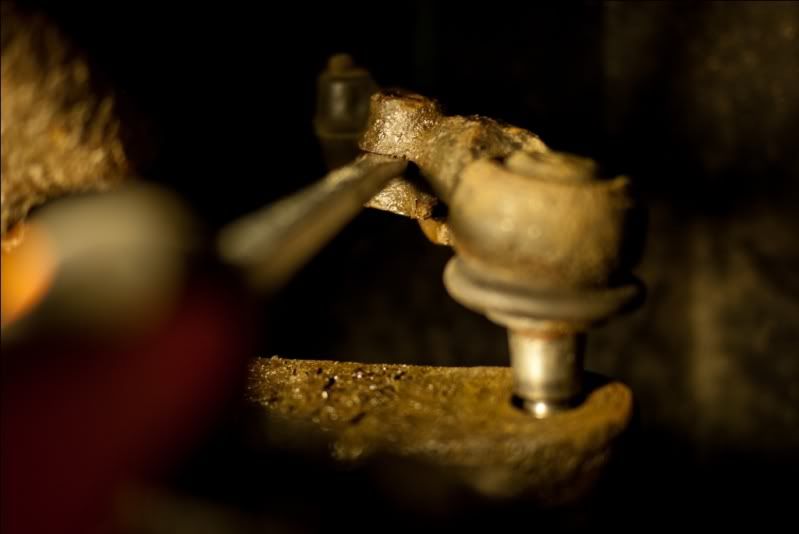
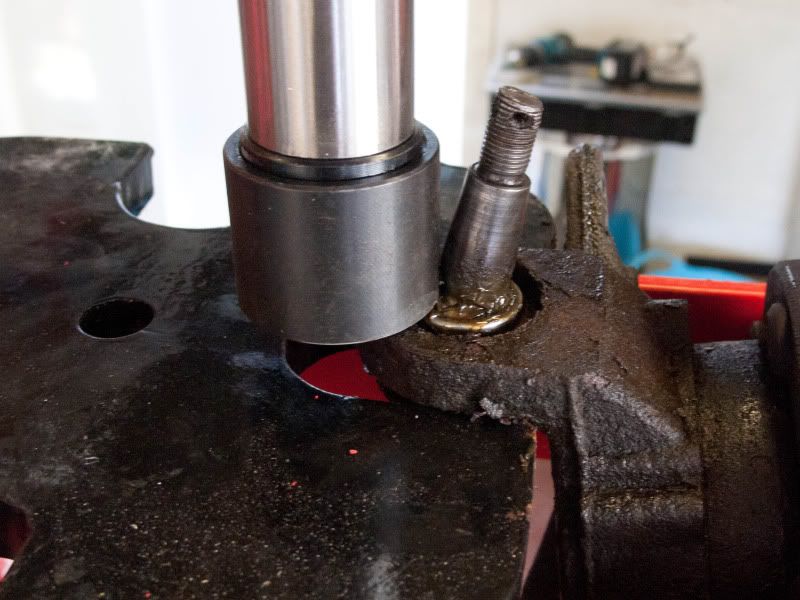
Using the hydraulic press to remove the defective ball joint.


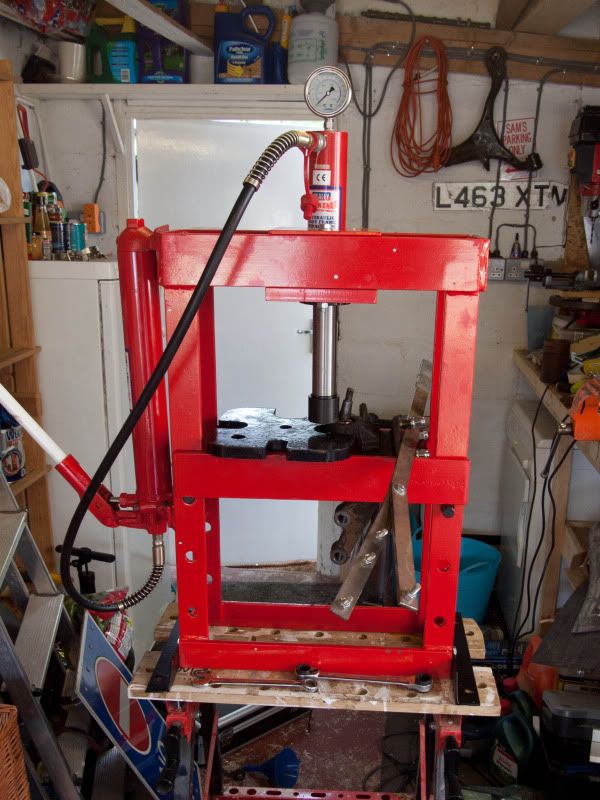
A picture of the hydraulic press. I opted for a Sealey 10Te press. It was a bit more expensive than a no-name ebay special, but these things are really powerful (read: dangerous) and I don't think it's worth skimping on. Also, the Sealey has a gauge which is nice.


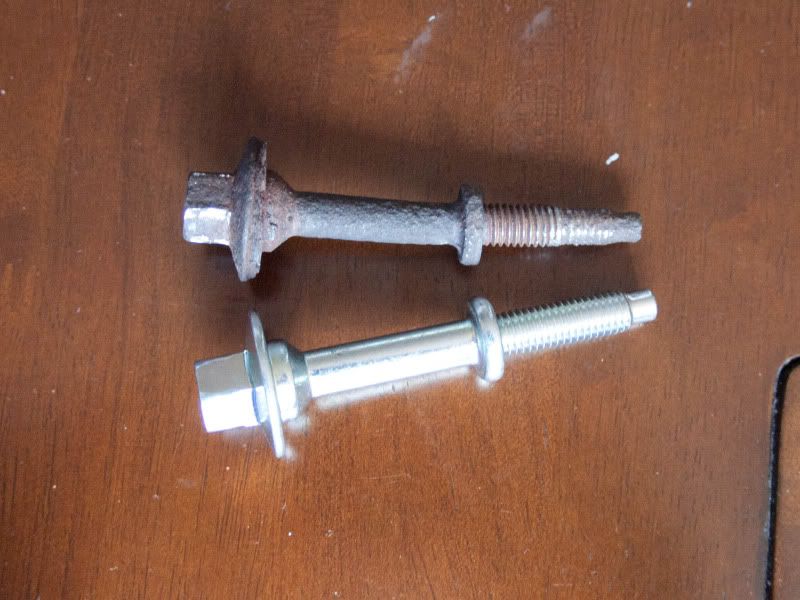
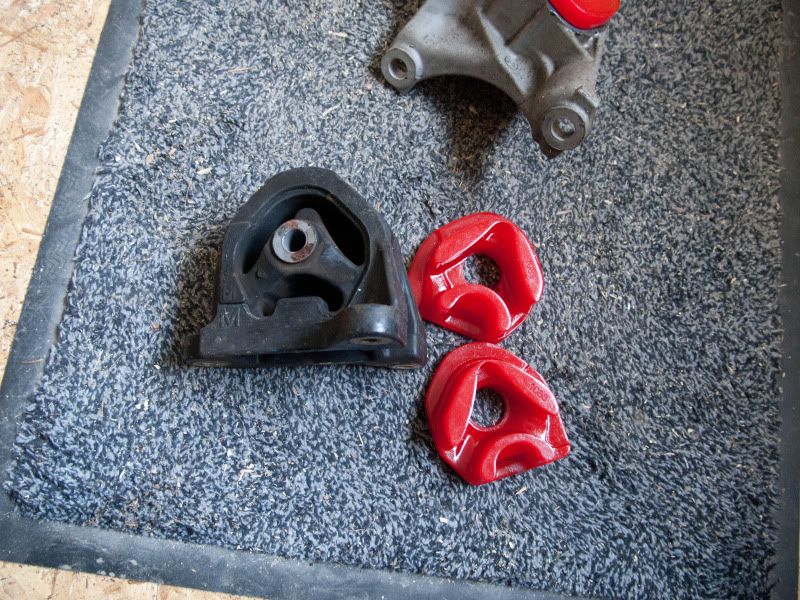
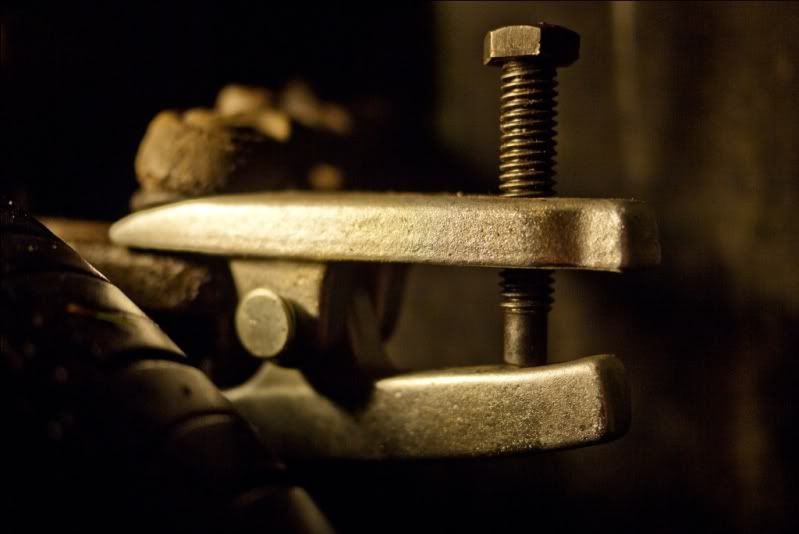
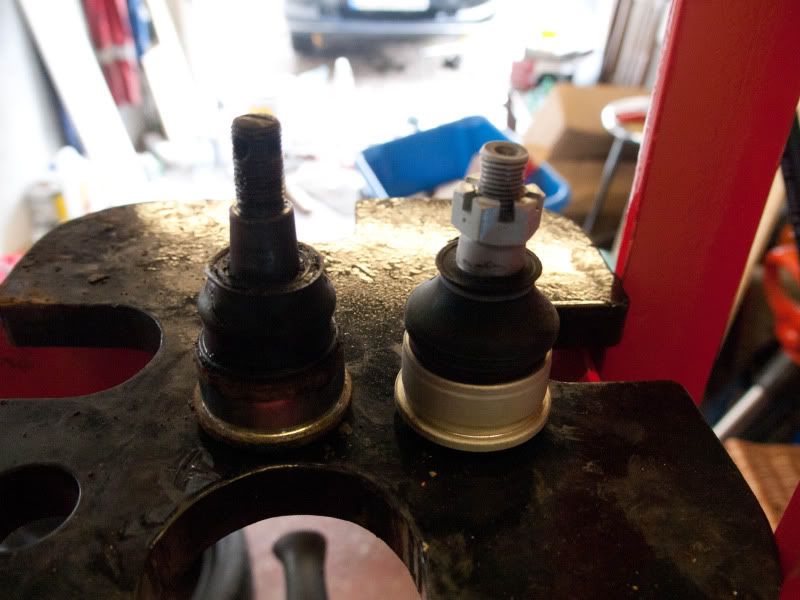
Obligatory old vs. new. The new one is frosted because it's been in the freezer!


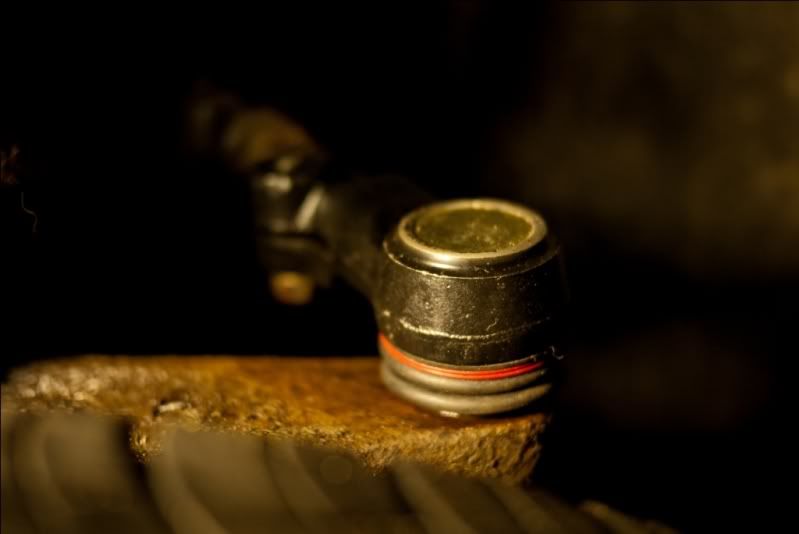
New one fitted to the knuckle. Ace!


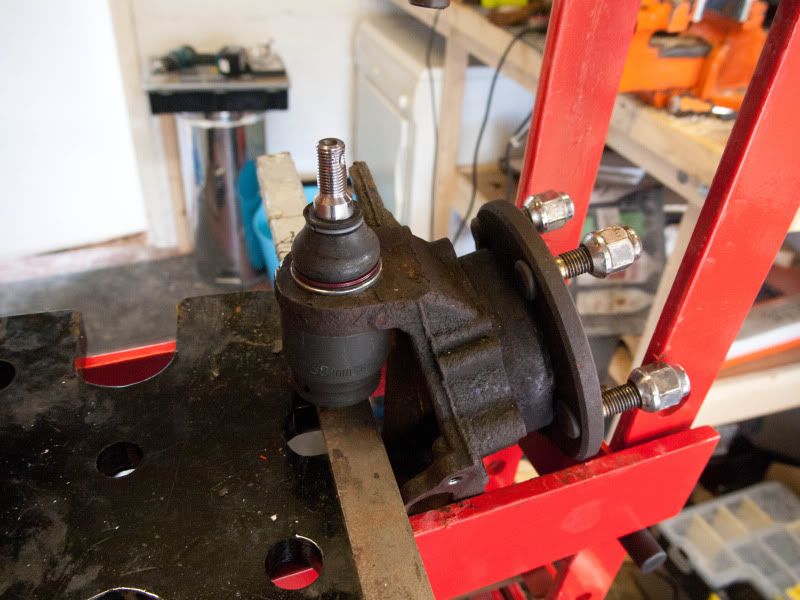
Another view. Don't you just love shiny newness?!


All back together. Still shiny! Don't forget to fit the split pin - I fitted mine after this picture was taken.


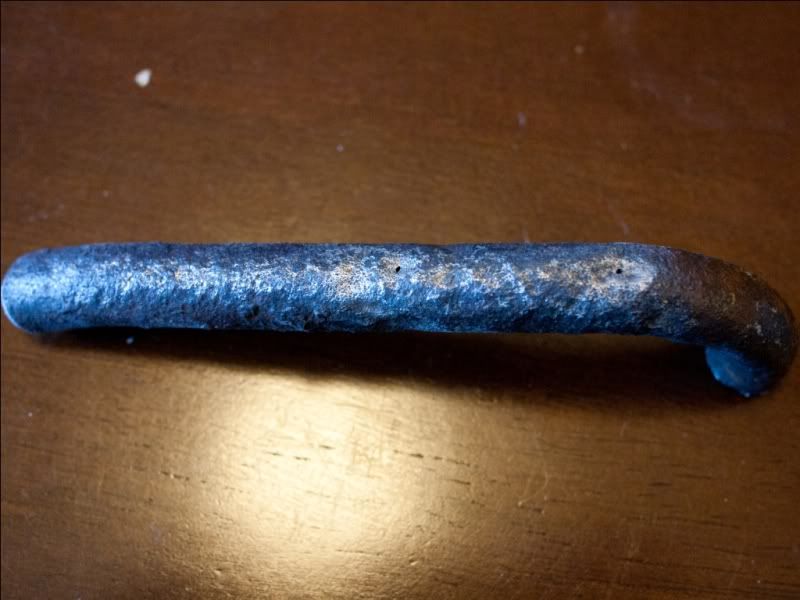
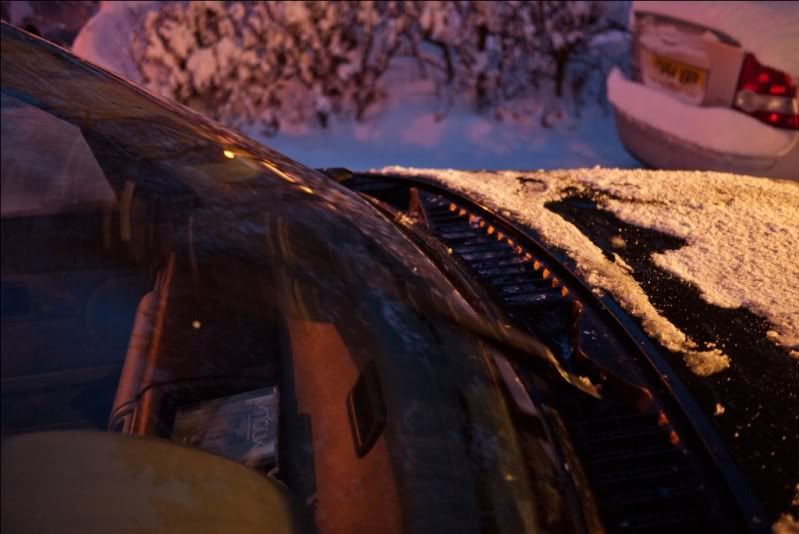
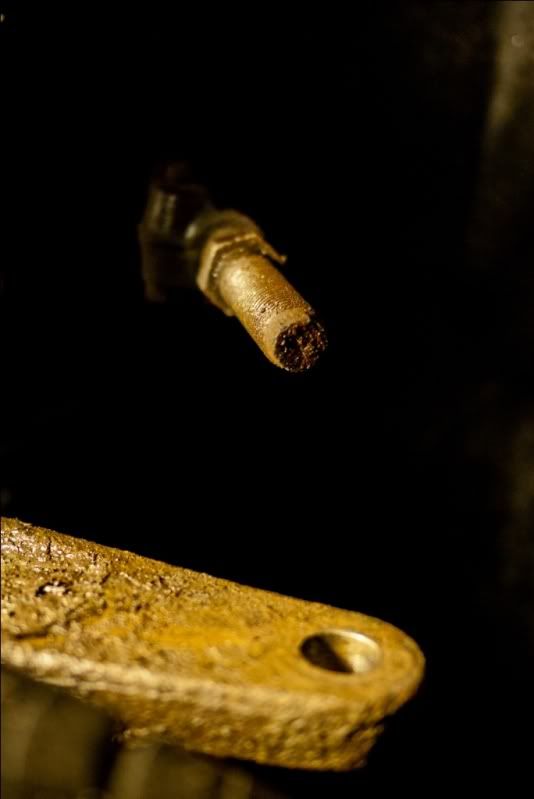
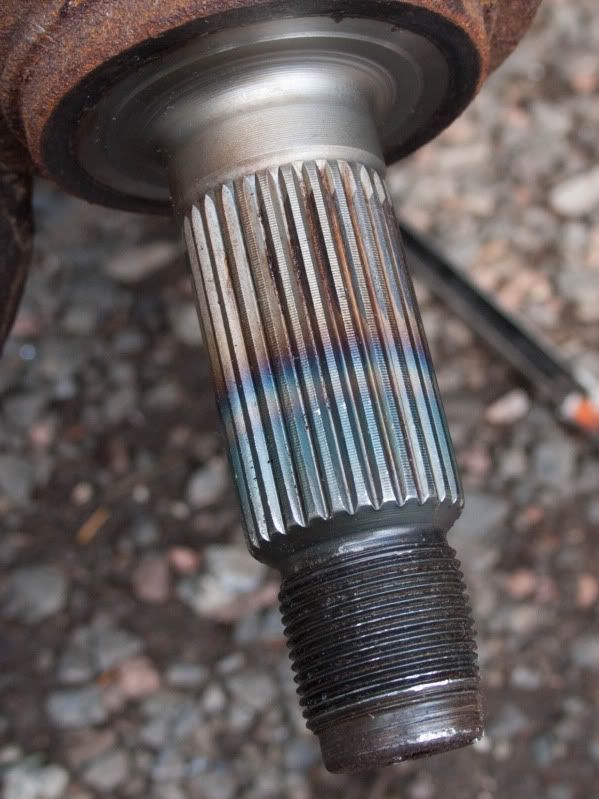
Finally, I wanted to take a picture of the splined end of the driveshaft. The colours are really nice. This is different types of oxidation, promoted by high temperatures. I'm not sure if this heat has been generated during driving or if it's indicative of heat treatment during manufacture (used to temper the shaft and make it 'stronger') but it sure looks nice!


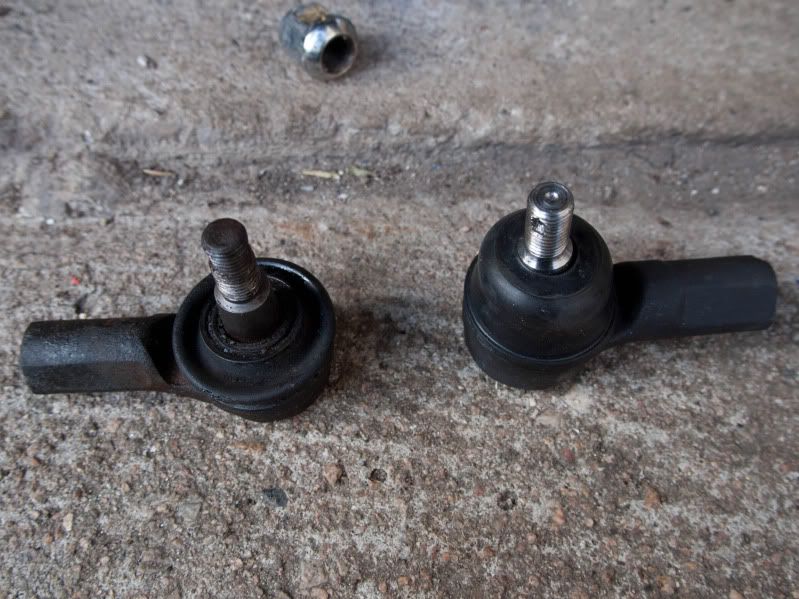
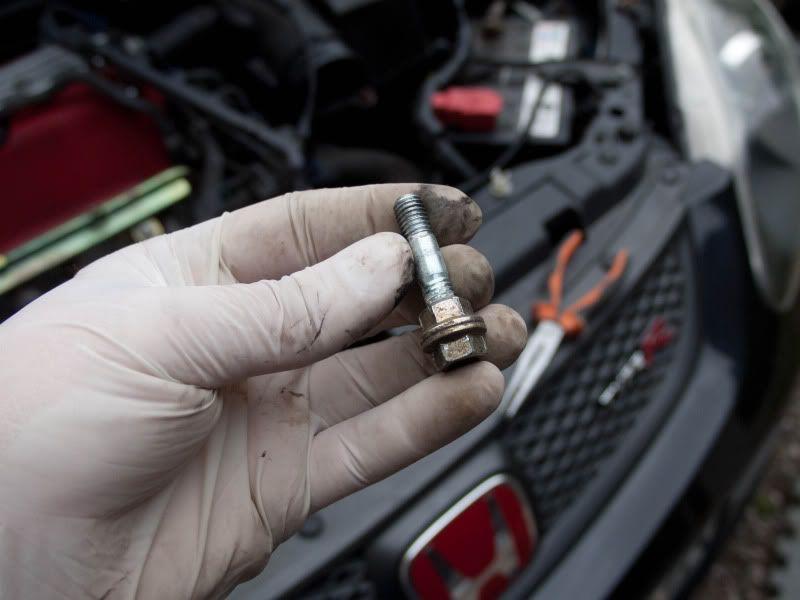
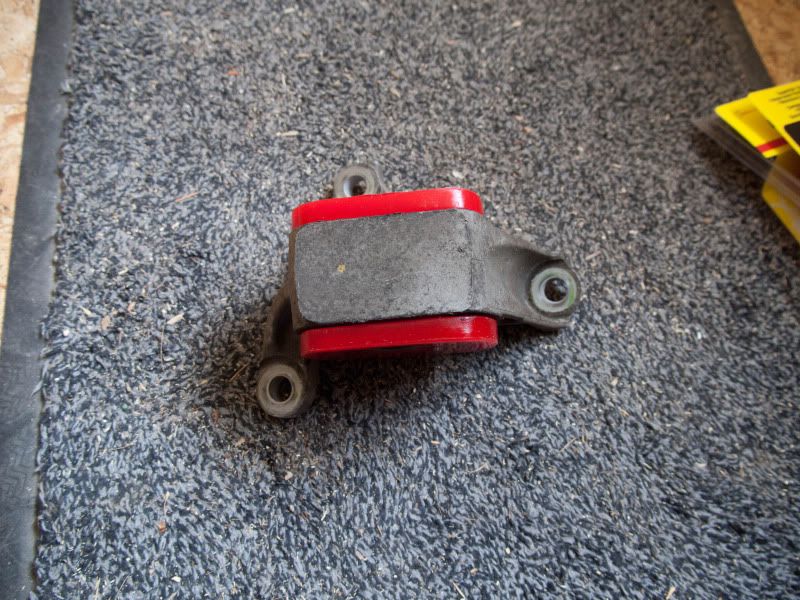
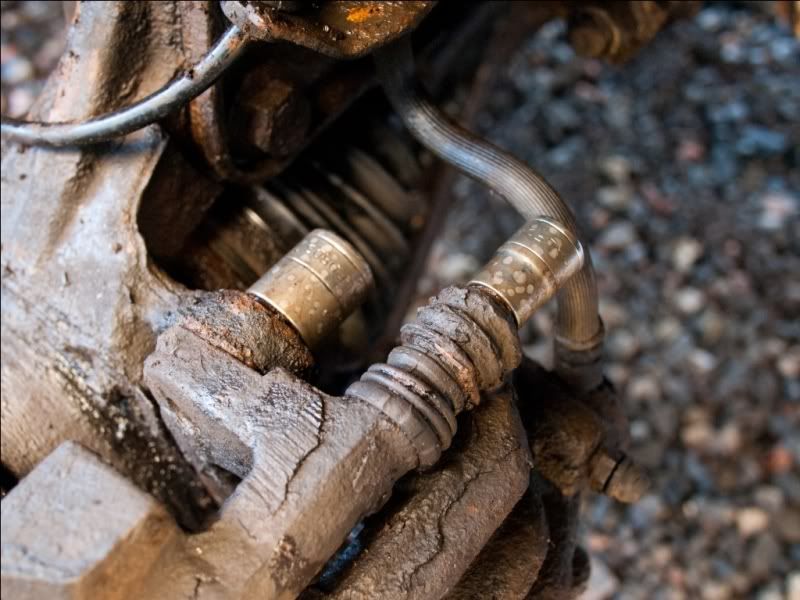
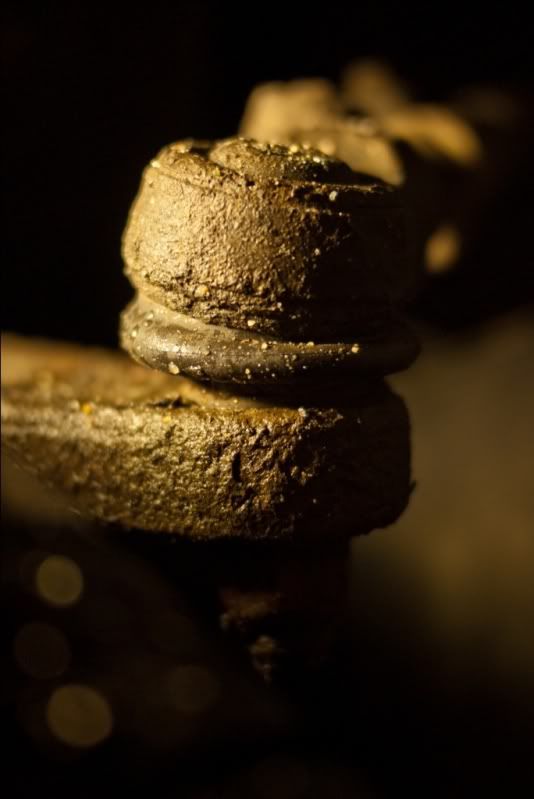
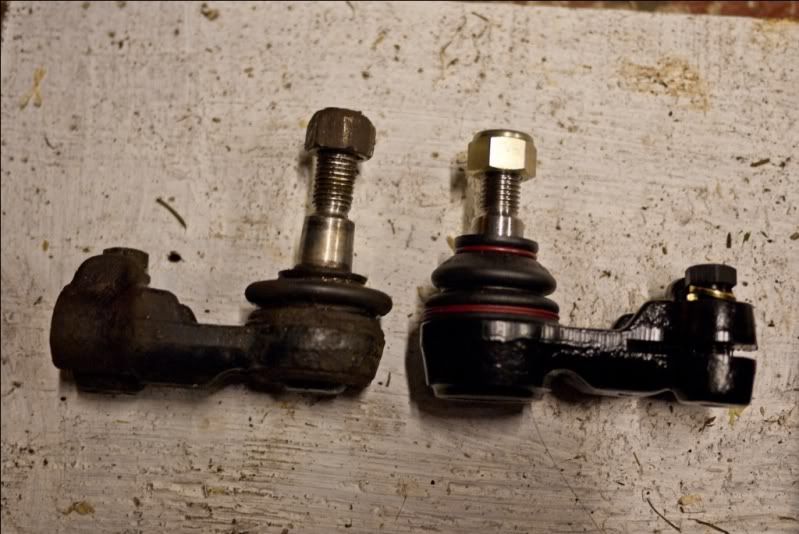
Also a shot showing the old vs. new for the track rod ends.

Thursday, June 30, 2011

Civic Exhaust Bolt Replacement

I recently discovered that one of the drop links connecting the front anti-roll bar have become worn and needed replaced. I tried to remove this drop link to confirm is was defective but the nut fouled on the threads due to corrosion and became stuck. I ended up having to take the hacksaw to this part to remove it. I then needed to remove the anti-roll bar whilst waiting for the new part to arrive. This is where the problems began....

The anti-roll bar runs between each front wheel, but curves up over the exhaust down-pipe in the middle of the car. This makes removal impossible without dropping the exhaust system to provide clearance. The down-pipe uses two spring-bolts to connect to the exhaust manifold and due to the heat these are subjected to, they were significantly corroded. Unfortunately upon removal, one of the bolts threads were stripped, the other sheared off in-situ. Gutted!

I did a bit of chin-scratching trying to decide what to do. The flange nut threads were badly damaged but the nuts could not be replaced because they were permanently connected to the exhaust manifold. What to do?

Eventually I decided to order new spring bolts from Honda and go through the hassle of removing the exhaust manifold and cutting off the captive nuts. Once these were removed, I could use normal replacement nuts which should make any future issues a lot simpler to sort out!

Removing the exhaust manifold turned out to be easier than I expect with most of the bolts still in reasonable shape considering the heat they have been subjected to. Clearance for removing the manifold from the engine bay was the most difficult thing, requiring the repositioning of some of the air-con pipework and ancillaries.

Once all back together all is fine! In fact, the engine sounds quieter at low revs / high load which suggests that the old exhaust bolts had loosened off. Here's a few pictures.

Obligatory old vs new exhaust bolt. The old one has stripped threads, extensive corrosion and is even bent out of shape!


The thread on the captive nut was also stripped, necessitating manifold removal...


The other exhaust bolts caused even more problems, shearing off when I tried to remove it...


Once the exhaust manifold had been removed, I cut off the captive nuts with a hacksaw.


Picture shows the new arrangement used to connect the exhaust down-pipe and manifold.

Monday, June 20, 2011

Civic Thermal Gasket (Inlet Manifold)

I have started making some slight modification to the Civic. These all generally follow the same rules, outlined below:

- Relatively inexpensive.
- In-keeping with the general ethos of the car as an unrefined fast road car.
- As a performance modification I must be able to understand why it provides an improvement before I'll consider purchasing it.

This modifications consists of a thick plastic replacement gasket which sits between the inlet manifold and the engine head. This provides a thermal barrier which prevents direct metal-to-metal contact between the engine and inlet manifold. This means the inlet manifold does not get as hot when the engine is running, meaning the inlet air charge is cooler and thus denser, which means the engine is more efficient and powerful. The change in temperature may not be hugely significant, but any improvement is welcome.

The gasket itself is very easy to fit. It simply replaces the existing metal gasket. Fitting is made slightly awkward because there are two studbolts used to align the manifold. This means the manifold must be pulled away from the head far enough to clear these studbolts before the gasket can be changed, however there is not enough space in the engine bay to pull the manifold out!

I found that screwing two nuts onto each studbolt and tightening them against each other provided a strong enough connection to allow the studbolts to be unscrewed and removed.

Here's a couple of pictures.

Old gasket (top) and new gasket (bottom).


Picture showing the studbolt (right hand side) issue...


...and the double-nut method for removal!


In a bid to perform a crude benchmarking test, I took the car on a 'control' route before fitting the gasket and afterwards. Admittedly not the most scientific experiment but good enough I feel. The results were that before the modification, the inlet manifold was between 'toasty-warm' and 'scorching'. I could hold my hand on it, but it wouldn't have taken much more heat to make it rather uncomfortably hot. After the modification, the manifold was slightly cooler, falling more into the 'radiator that's been on recently' category of warmth. There was still considerable heat making its way to the manifold, so I did some investigating....

I found that the engine cooling system is plumbed into the idle speed control valve on the throttle body. I have read a few explanations for this ranging from improving emissions by allowing the engine to warm up quicker or preventing the throttle from sticking open in very cold conditions! I don't feel either is particularly important in the middle of the 'Great British Summer' so I bypassed this and took the car for another 'control' test. I can happily say the manifold is now in the 'trace of warmth' category and the temperature rise over ambient is only slight.

So what has this done to the performance of the car? Well it's all very subjective of course, and I don't expect anyone to take this as gospel, but I do feel there is more midrange punch from the engine. I used to feel that the engine bogged down after 3k until the Vtec kicked in at 5.8k. Now it feels like the engine pulls much more uniformly throughout the rev range. Happy days!

Friday, May 20, 2011

Civic Energy Suspension Engine Mount Inserts

I modified my Civic. I realise this puts me in a category known as 'chav' with some people, but my girlfriend can just deal with that!

The Civic is a bit of an enigma. It is a car that nearly develops 100bhp/liter in standard form without forced induction. It has stiff suspension, very stiff tyres and a close ration 6-speed gearbox. It seems like a car without too much in the way of compromise, with performance being at the forefront of most design decision. This is not the case and perhaps the most surprising compromise is with the engine mounts.

The engine / gearbox assembly is connected to the chassis via 4 mounts; nearside, offside, front and rear. The front and rear resist the rotational movement of the engine, an important consideration for a high-revving engine. It is these engine mounts that surprise. They are really soft!

Anyone who has owned and driven one of these cars will probably know about the wheel-hop issue. In the wet, accelerating in second gear is exciting. Traction is fine until you hit 5.8k revs, when Vtec kicks in. When this happens, the wheels lose traction and begin 'hopping'. What actually happens is that the engine is rotating clockwise and anti-clockwise, due to insufficient damping by the engine mounts, and traction is lost.

The solution to this problem is cheap. Energy Suspension produce so-called 'engine-mount inserts' which are polyurethane 'chunks' shaped to fill the gaps in the standard mounts. These increase the stiffness of the front and rear engine mounts, and really do prevent this wheel-hop in the wet.

Removing this compromise does actually go some way to explaining why Honda designed the car in this way in the first place. The stiff engine mounts cause significantly increased vibrations within the car, especially when idling. This appeared very bad initially and has reduced since fitment. Whether this is softening of the mounts over time, or I'm becoming accustomed to the vibrations, or both, I don't know. However the vibration issue is easy to live with due to the much-improved gear changes.

With a stiff mounted engine, blipping the throttle on downchanges has become a joy. The car feels much more like a Type R should be: informative, responsive and satisfying to drive. It is hard to drive smoothly compared to a normal car, even moreso after this modification, but it can be driven smoothly with a lot of driver involvement. I am constantly trying to better myself as a driver and having a car that lets me know if I'm doing the right things or not means that even driving smoothly around town is a satisfying experience. This car is not for everyone but at this stage in my life, I absolutely love every minute.

Fitting these was difficult because it required the subframe to be dropped down. I didn't take any under-car pictures but I did take some pictures of the mounts when removed from the car.

One of the mounts showing the gaps all around the mount.


The inserts for this mount.


The other mount. Mount is sad.


Again, picture showing inserts.


How the mount looks with the inserts fitted.

Thursday, December 30, 2010

Freelander Oil Cooler Pipe Rupture

The missus came home from work yesterday complaining that the oil light on the dash was 'flickering'. I went out to look and the front drivers side wheel was covered in engine oil. I pointed this out and she corrected me; "No, that's just road grime."

Well upon closer inspection, it appears that this 'road grime' has come from a corroded oil cooler pipe which just so happened to spring a leak that sprayed the entire front hub in oil!

Here's the slimy remnants:


I have ordered new pipes, new front discs and pads, new oil filter and new oil. I'm not going to enjoy getting messy with this one, I just know it.


Update 1 (31/12/10)

I managed to get the removal work done today. I multi-tasked by draining the oil, then soaking the messy drivers side hub with degreaser whilst setting about removing the passengers side brakes.

Here's a picture of the oily side soaking with some degreaser that had a lovely citrus smell!!


Passenger side hub with caliper removed. This was incredibly difficult to remove partly due to the wear lip on the edge of the disc and partly because the car is old and everything was very tight.


Old pads.


The old disc proved very reluctant to budge. I had to resort to violence and even then it took a good 5 minutes.


The dust cover was badly corroded and had to go.


Having cleaned everything, I reassemble whilst I'm waiting on parts arriving in the post.


I then repeated the procedure on the drivers side. This was more difficult as two bolts holding the caliper in place had rounded off. I had little option but to take a slightly smaller imperial socket and fit it over the rounded bolt using the sledgehammer. Luckily they both came free and I managed to clean things up and put it back together again. I left the imperial sockets in place for now.


Now I removed the oil cooler pipes. These were very stiff too. Once removed I cut the ends off, crimped them then put them back in place to stop any debris getting into the oil system.


And finally here's a shot of the offending piece of pipe with the two small holes clearly visible.

Sunday, December 19, 2010

Freelander Wiper Motor Bodge

I'd recently cleaned a load of snow off the screen on my girlfriend's Freelander, and after this the wipers stopped working. I changed the fuse but it kept blowing. I disconnected the motor and this stopped the fuses blowing. The problem therefore had to be within the motor unit.

So...I went outside to find this had happened overnight...!


Once cleaned off, I started taking things apart. Once the scuttle was removed, I could see the motor assembly. At this point I disconnected the plug and tested the circuit - no fuse was blowing which showed the problem was within the motor unit.


I removed the motor assembly and took it to my workshop. I drilled out the rivets and opened the gearbox.


Aha! My previous solder job had melted and repositioned itself under high current load whilst shifting heavy snow.


I got the soldering iron out and put it back where it should be. This is not ideal, but as the car is on its last legs, and I promise not to use the wipers in an aggressive fashion again, it should hopefully suffice.


Put cover back, rivet in place.


Reinstall, put everything back and test. I don't know if the movement comes across in this photo but it all works as it should do now.

Tuesday, December 14, 2010

Freelander Track Rod End Replacement

This winter has already taken its toll on my girlfriend's Freelander. Lots of clunking and a wobbly wheel led to the discovery of a borked track rod end. I got a replacement today so took a few pics whilst changing it.

Unfortunately my girlfriend is in Brazil and I could NOT find the locking wheel nut key ANYWHERE! So, I had to leave the wheel on and fumble about like a cock!

Here's the old one:


Removed the bottom nut, and used my trusty ball joint splitter to make a lovely clunk noise.


Once loose, I had to remove the clamping bolt - an unusual feature that I've not seen on a track rod end before. Using a screwdriver to loosen the assembly. Once loose, it simply unscrewed. Well, it was damn tight but it came eventually! I counted the number of turns it took to come off.


Here's the obligatory old vs new shot.


Clean up the hub and track rod.


Fit the new one turning it the same number of turns that the old one had.


Got the car booked in to get the tracking done now. I'm concerned there's something else wrong with it as it's still making funny noises, but these cars are notoriously unreliable and this is a 12 yr old example....