Thursday, June 30, 2011

Civic Exhaust Bolt Replacement

I recently discovered that one of the drop links connecting the front anti-roll bar have become worn and needed replaced. I tried to remove this drop link to confirm is was defective but the nut fouled on the threads due to corrosion and became stuck. I ended up having to take the hacksaw to this part to remove it. I then needed to remove the anti-roll bar whilst waiting for the new part to arrive. This is where the problems began....

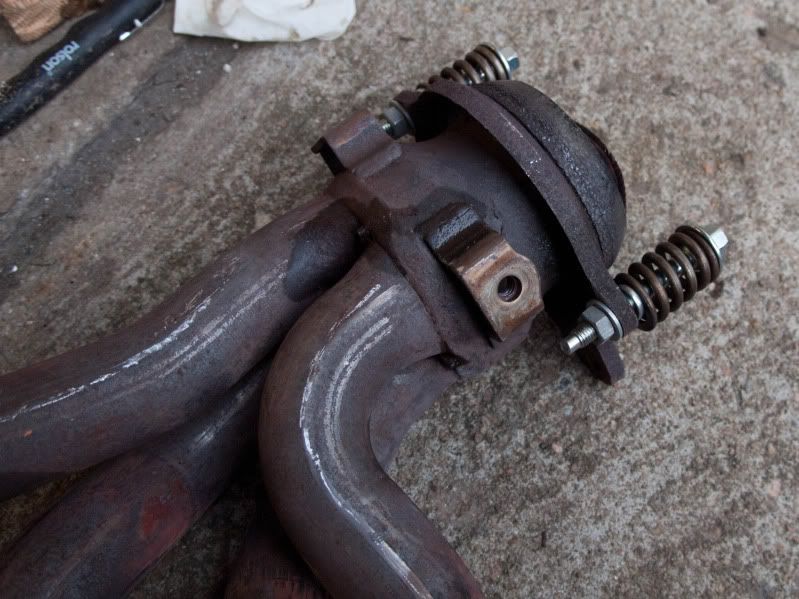
The anti-roll bar runs between each front wheel, but curves up over the exhaust down-pipe in the middle of the car. This makes removal impossible without dropping the exhaust system to provide clearance. The down-pipe uses two spring-bolts to connect to the exhaust manifold and due to the heat these are subjected to, they were significantly corroded. Unfortunately upon removal, one of the bolts threads were stripped, the other sheared off in-situ. Gutted!

I did a bit of chin-scratching trying to decide what to do. The flange nut threads were badly damaged but the nuts could not be replaced because they were permanently connected to the exhaust manifold. What to do?

Eventually I decided to order new spring bolts from Honda and go through the hassle of removing the exhaust manifold and cutting off the captive nuts. Once these were removed, I could use normal replacement nuts which should make any future issues a lot simpler to sort out!

Removing the exhaust manifold turned out to be easier than I expect with most of the bolts still in reasonable shape considering the heat they have been subjected to. Clearance for removing the manifold from the engine bay was the most difficult thing, requiring the repositioning of some of the air-con pipework and ancillaries.

Once all back together all is fine! In fact, the engine sounds quieter at low revs / high load which suggests that the old exhaust bolts had loosened off. Here's a few pictures.

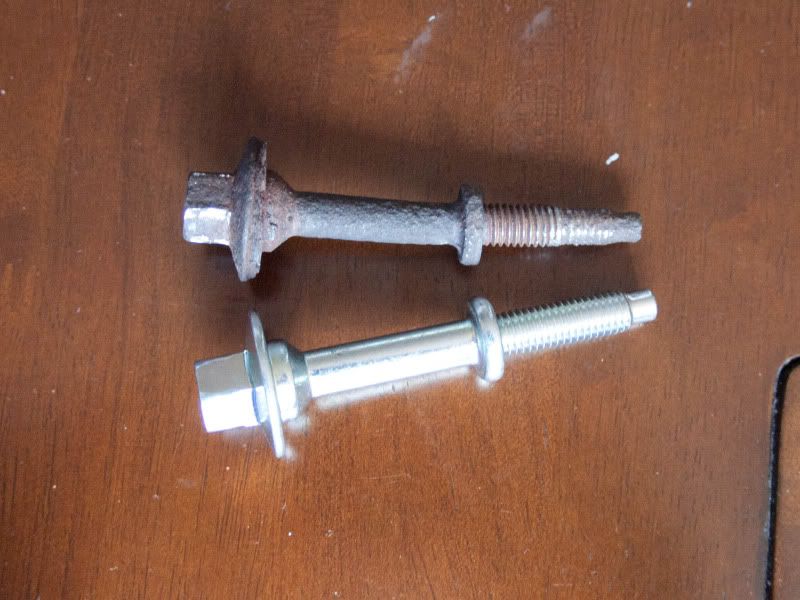
Obligatory old vs new exhaust bolt. The old one has stripped threads, extensive corrosion and is even bent out of shape!


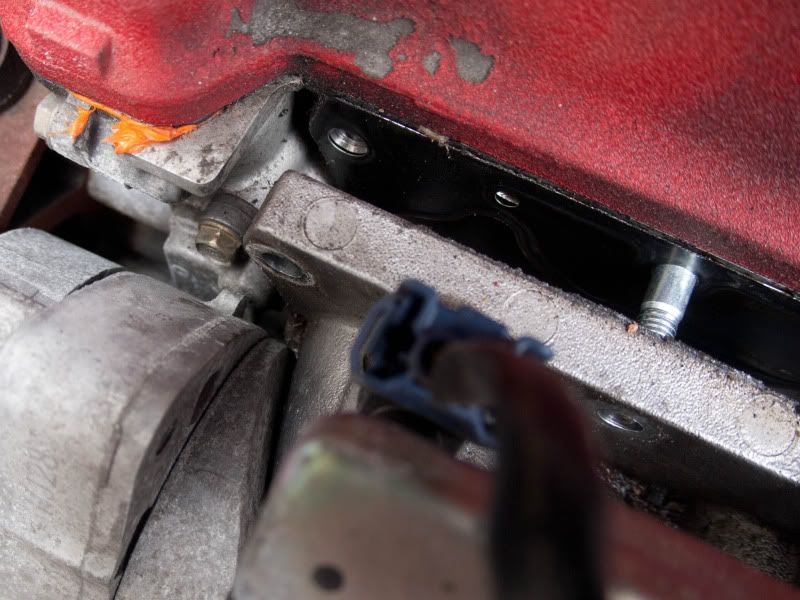
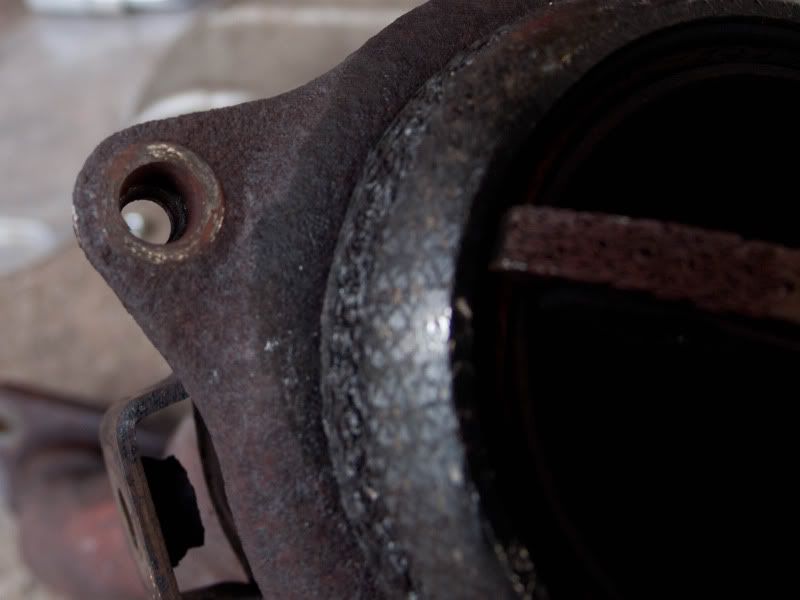
The thread on the captive nut was also stripped, necessitating manifold removal...


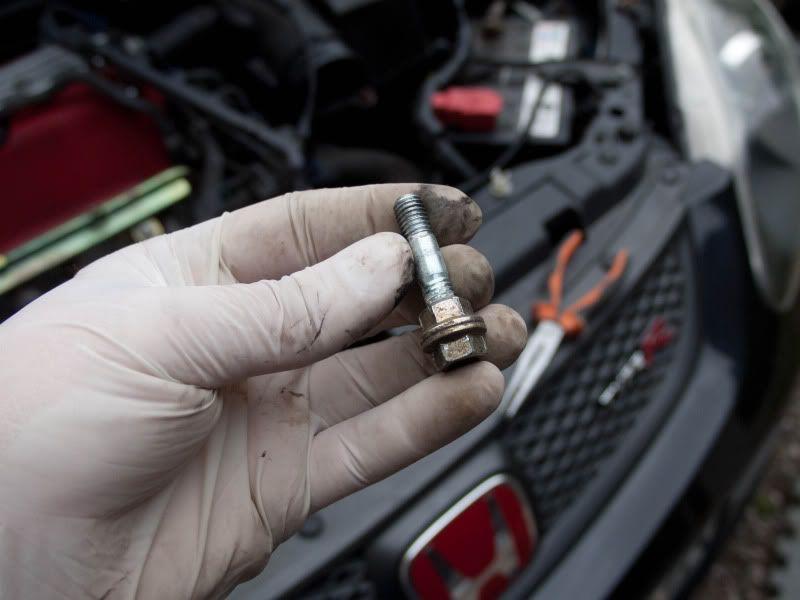
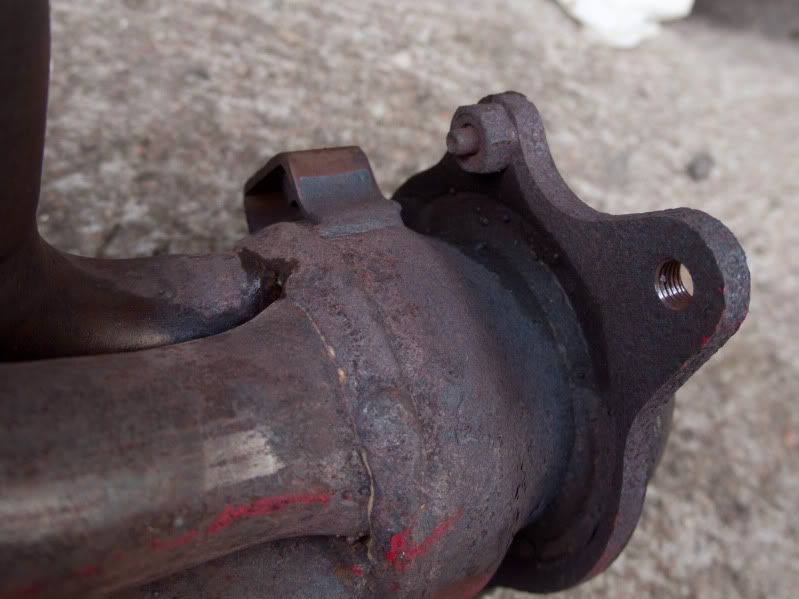
The other exhaust bolts caused even more problems, shearing off when I tried to remove it...


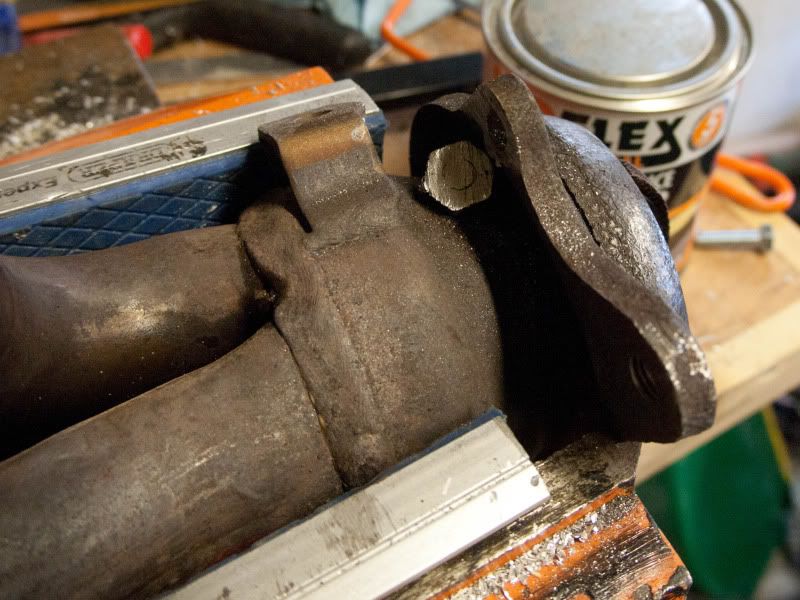
Once the exhaust manifold had been removed, I cut off the captive nuts with a hacksaw.


Picture shows the new arrangement used to connect the exhaust down-pipe and manifold.

Monday, June 20, 2011

Civic Thermal Gasket (Inlet Manifold)

I have started making some slight modification to the Civic. These all generally follow the same rules, outlined below:

- Relatively inexpensive.
- In-keeping with the general ethos of the car as an unrefined fast road car.
- As a performance modification I must be able to understand why it provides an improvement before I'll consider purchasing it.

This modifications consists of a thick plastic replacement gasket which sits between the inlet manifold and the engine head. This provides a thermal barrier which prevents direct metal-to-metal contact between the engine and inlet manifold. This means the inlet manifold does not get as hot when the engine is running, meaning the inlet air charge is cooler and thus denser, which means the engine is more efficient and powerful. The change in temperature may not be hugely significant, but any improvement is welcome.

The gasket itself is very easy to fit. It simply replaces the existing metal gasket. Fitting is made slightly awkward because there are two studbolts used to align the manifold. This means the manifold must be pulled away from the head far enough to clear these studbolts before the gasket can be changed, however there is not enough space in the engine bay to pull the manifold out!

I found that screwing two nuts onto each studbolt and tightening them against each other provided a strong enough connection to allow the studbolts to be unscrewed and removed.

Here's a couple of pictures.

Old gasket (top) and new gasket (bottom).


Picture showing the studbolt (right hand side) issue...


...and the double-nut method for removal!


In a bid to perform a crude benchmarking test, I took the car on a 'control' route before fitting the gasket and afterwards. Admittedly not the most scientific experiment but good enough I feel. The results were that before the modification, the inlet manifold was between 'toasty-warm' and 'scorching'. I could hold my hand on it, but it wouldn't have taken much more heat to make it rather uncomfortably hot. After the modification, the manifold was slightly cooler, falling more into the 'radiator that's been on recently' category of warmth. There was still considerable heat making its way to the manifold, so I did some investigating....

I found that the engine cooling system is plumbed into the idle speed control valve on the throttle body. I have read a few explanations for this ranging from improving emissions by allowing the engine to warm up quicker or preventing the throttle from sticking open in very cold conditions! I don't feel either is particularly important in the middle of the 'Great British Summer' so I bypassed this and took the car for another 'control' test. I can happily say the manifold is now in the 'trace of warmth' category and the temperature rise over ambient is only slight.

So what has this done to the performance of the car? Well it's all very subjective of course, and I don't expect anyone to take this as gospel, but I do feel there is more midrange punch from the engine. I used to feel that the engine bogged down after 3k until the Vtec kicked in at 5.8k. Now it feels like the engine pulls much more uniformly throughout the rev range. Happy days!